In this post, I am going to talk about how to backup Slack messages and how we can export Slack messages in a more readable and customizable html file easily.
We will use 2 tools for this.
1 > Slackdump for exporting the Slack message as json files
2 > We will create a local javascript (react) app that receives multiple json files and output the filtered json as readable html
Export the Slack messages
We will use SlackDump , a command line tool that run on our machine, to export Slack conversations without having an admin account or having to add a Slack application. In this article, I am going to talk about backup in Windows. However, SlackDump also has multiple options for MacOS and Linux. We will focus on backup conversation messages here but you can also export users, files and emojis too. Check SlackDump github readme section for more details.
Download the latest Slackdump_Windows_x86_64.zip from the github release page > https://github.com/rusq/slackdump/releases/
Then, run the .exe file in the unzipped folder.
It will run a CLI and you will see the first screen as follows.
Slackdump 2.4.0 (commit: 4e9bb6fd2af4d773ffb99d1ba77abf5506ec89f0) built on: 2023-05-20T00:00:48Z
? What would you like to do?  [Use arrows to move, type to filter]
> Dump - save a list of conversations
  Export - save the workspace or conversations in Slack Export format
  List - list conversations or users on the screen
  Emojis - export all emojis from a workspace
  Exit - exit Slackdump and return to the OS
Choose Export (use arrow keys and Enter to navigate here).
Then, open windows explorer, create the destination folder and copy the folder path.
Copy and paste the folder path in Cli.
Enter the Slack channel id (channel id is at the bottom of About tab of channel name).
Enter the workspace name (workspace name is at the bottom of workspace name, not the showing name).
Login screen will pop up, login to Slack with your email of Slack account.
After login, the exported json files will be saved in chosen destination folder. It will export all messages from all users in the channel you have chosen.
Format multiple json files to readable html
We will create a small react app locally for formatting the json files. We will use jmespath query in our app for transforming json.
Open command prompt (terminal for macOS) and check if Node.js is already installed with this command.
node -vIf your machine don’t have Node.js, first install Node.js > https://nodejs.org/en
Next we will create a react app and install required library for the react app. Open VS code and create a folder for our react app to stay and open terminal in this folder and run the following command.
npx create-react-app json-analysis-app
cd json-analysis-app
npm install jmespath
After complete, you will see some files in the folder.
We will use hard coded query here as an easy way. (We are talking about “const query = blah blah” at the first line of function in the App.js code here) you can change the query as you like based on your specific requirements. Check jmespath for creating query for JSON. You can use an online tool for writing JMESPath query visually. This tool will help for writing query visually. https://codebeautify.org/jsonviewer (put the example json block to this tool for writing query, don’t forget to put the json within [ ] block).
Replace src/App.js with the following code:
import React, { useState } from 'react';
import jmespath from 'jmespath';

function App() {
  const query = '[? user_profile.display_name == `"My_Display_Name_at_Slack"`] | sort_by(@, &ts) | [*].text'
  const [files, setFiles] = useState([]);
  const [output, setOutput] = useState('');

  const handleFileInputChange = (event) => {
    const selectedFiles = Array.from(event.target.files);
    setFiles(selectedFiles);
  };

  const handleFilter = () => {
    let filteredOutput = '';

    const sortedFiles = [...files].sort((a, b) => a.name.localeCompare(b.name));

    const processFile = (file) => {
      return new Promise((resolve) => {
        const reader = new FileReader();

        reader.onload = (e) => {
          const fileContent = e.target.result;
          const jsonData = JSON.parse(fileContent);
          const filteredData = jmespath.search(jsonData, query);

          if (filteredData !== null) {
            const fileName = file.name;
            const formattedOutput = `${fileName}:\n${String(filteredData)
              .replace(/\n/g, '\\n')
              .replace(/\\n/g, '\n')}\n\n`;
            filteredOutput += formattedOutput;
          }

          resolve();
        };

        reader.readAsText(file);
      });
    };

    const processFilesSequentially = async () => {
      for (const file of sortedFiles) {
        await processFile(file);
      }

      if (filteredOutput !== '') {
        setOutput(filteredOutput);
      }
    };

    processFilesSequentially();
  };

  return (
    <div className="App">
      <h1>JSON Filter App</h1>
      <div>
        <label htmlFor="file-input">Select JSON files:</label>
        <input type="file" id="file-input" multiple onChange={handleFileInputChange} />
      </div>
      <button onClick={handleFilter}>Output</button>
      <div>
        <pre>{output}</pre>
      </div>
    </div>
  );
}

export default App;
Repalce App.css with this code.
.App {
  text-align: center;
  margin-top: 2rem;
}

pre {
  background-color: #f5f5f5;
  padding: 1rem;
  white-space: pre-wrap;
  word-wrap: break-word;
  max-width: 800px;
  margin: 0 auto;
}
To run the app, run this command in terminal:
npm startThis will open our react app at localhost:3000.
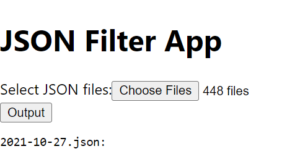
You can upload multiple json files to the app. Then click the “Ouput” button.
The app will get json data from uploaded files and output the filtered text.
App UI will be as follow.

That’s it.
Right click on the page and save as html or choose “inspect” and copy the required html tag and use as you like.
Conclusion
There are various approaches of how to backup slack messages. Using this approach, you can check your backup messages in a more readable format rather than difficult to read Json files.


Leave a Reply