In this article, I will talk about how to setup Focalboard, an open-source project management app on Oracle ubunbu Arm64 VPS server using docker and Nginx reverse proxy. We will also setup subdomain and https for our app.
What is Focalboard
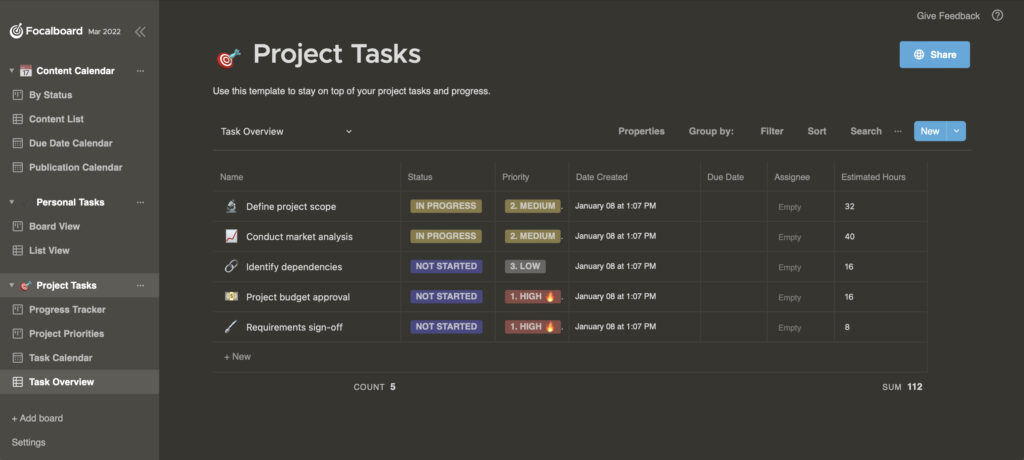
Focalboard is an open source project management app. Some features of Focalboard include
- project management
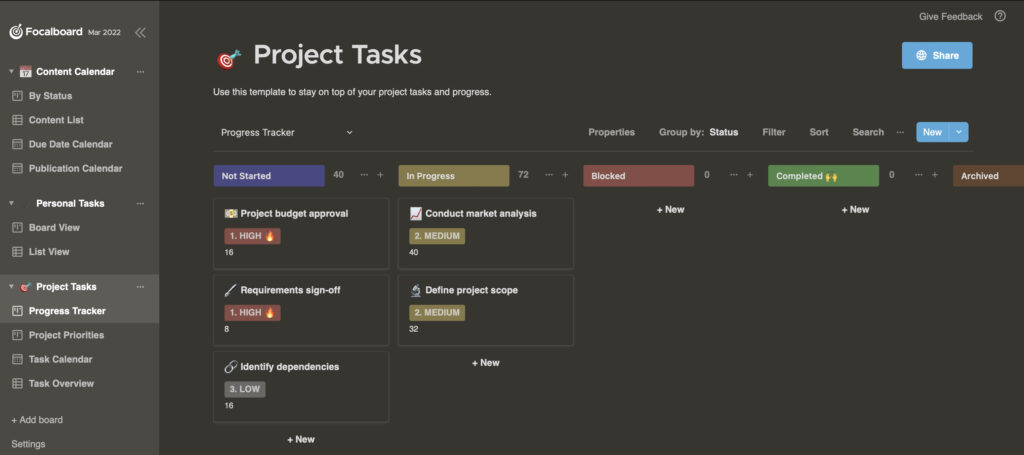
- kanban board
- task management
- organizer
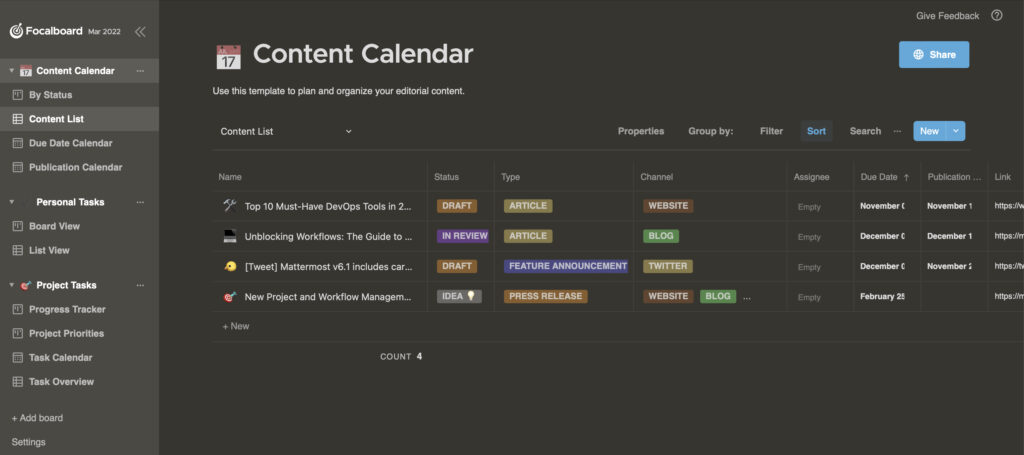
- calendar view
- gallery view
- custom properties (you can add custom fields for your tasks)
- custom templates (you can set custom template for your projects or you can choose from multiple built in templates)
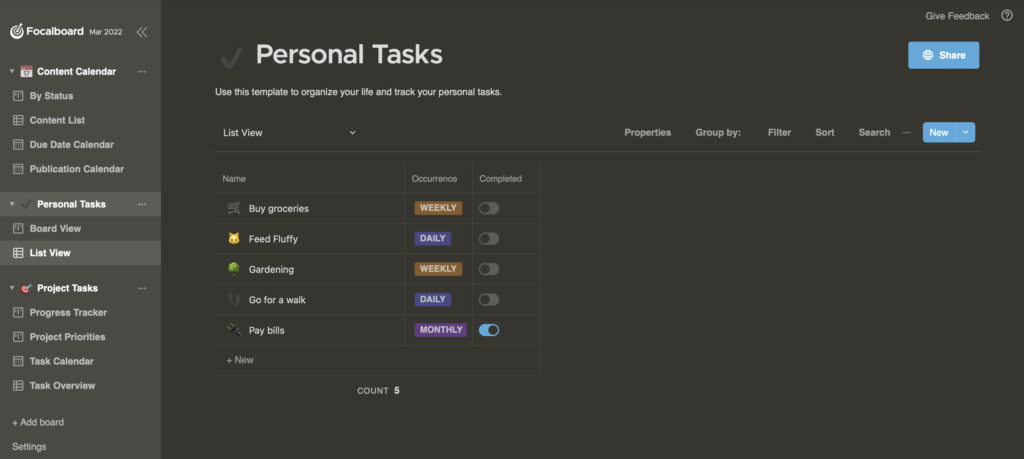
It can be used for team collaboration or for personal task/project management. I installed this app for personal use case.
Focalboard github repo has received almost 18k stars and is being actively maintained. However, there is one drawback within Focalboard that it lacks mobile view and mobile view is not working properly.
Installation Options
Focalboard has various installation options.
-> Install Focalboard plugin in your existing Mattermost server.
-> Install on your personal server as web application using source code or docker container (We will focus on this part in this article).
-> Get desktop app, a stand-alone single-user app for Mac, Windows, or Linux.
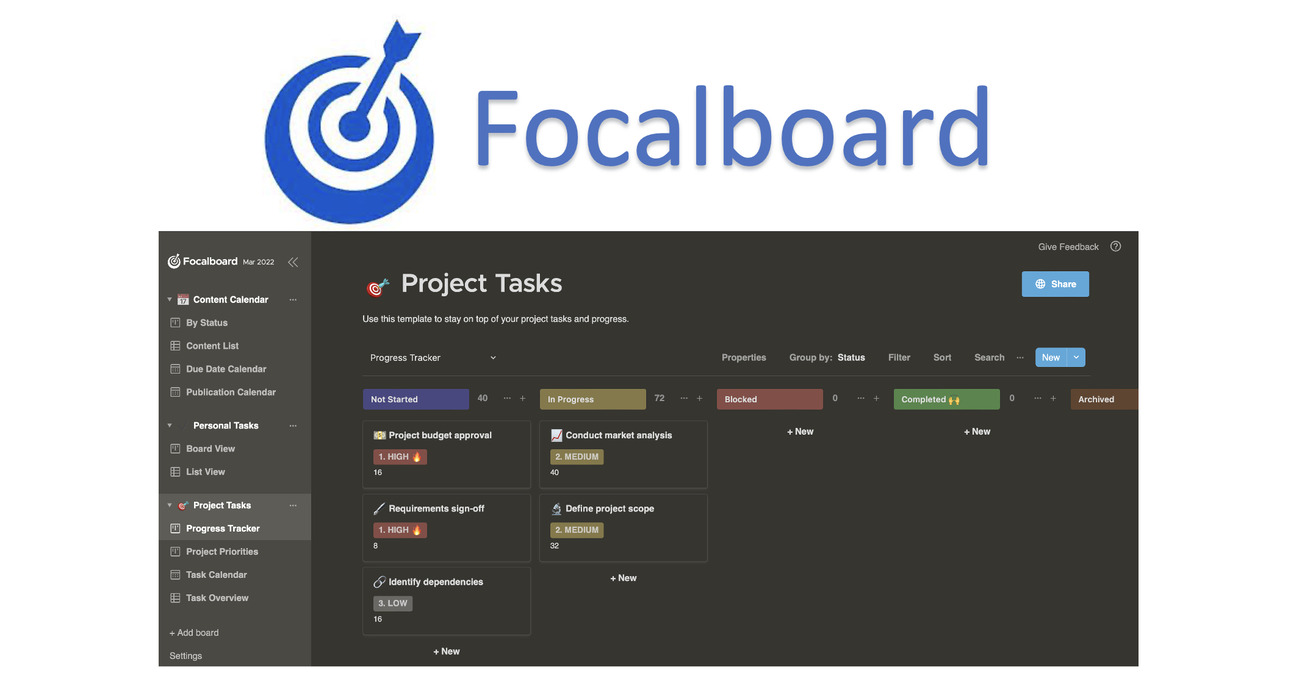
Screenshots
For more insights, let’s see some screenshots.
Setup Focalboard on Oracle VPS
I assume you have already created and own Oracle VPS instance and your instance is already accessible via SSH. In case you still don’t know about Oracle VPS, check the article Conclusions About Oracle’s Always Free VPS.
If your instance shape is VM.Standard.E2.1.Micro or any amd64 shape, you can install the official docker image of Focalboard because the official image only supports server with amd64 architecture.
If your VPS instance is with arm64 architecture, we must install third party docker image that is compatible with arm64. In my case, my Oracle VPS instance is VM.Standard.A1.Flex which is arm64, I could not install the official image of Focalboard.
There are many Focalboard docker images that support arm64 server, but I found only the image from this link works well with Oracle always free VM.Standard.A1.Flex instance.
Server Preparation
Prepare your SSH key file and open terminal or any command tool where SSH key file located to access to VPS server via SSH.
ssh -i your-ssh-key.key ubuntu@100.100.5.200Replace your SSH key file name and server IP address in the above command.
Then run sudo apt update as we usually do when accessing to server.
Then, install docker and nginx to the server if haven’t installed yet.
For how to install docker engine on Ubuntu, check this manual from docker documentation.
For installing nginx, run the command: sudo apt install nginx
Installing Focalboard with Docker and Firewall Setup
Run this command to pull the Focalboard docker image that works with arm64 server.
sudo docker pull stoub/focalboard:7.11.2Check if the image has pulled successfully:
sudo docker imagesRun the image at localhost port 2000 of our server with the following command:
sudo docker run -it -p 2000:8000 stoub/focalboard:7.11.2Check if the container is running
sudo docker psWe should see stoub/focalboard container running at port 2000.
To configure the system’s firewall to allow incoming TCP connections on port 2000 in order to be accessible from other devices, we need to run this command:
sudo iptables -I INPUT -m state --state NEW -p tcp --dport 2000 -j ACCEPTThen we need to add Ingress Rule to our VPS instance.
- Login to your Oracle Cloud and go to instance detail page.
- Click on Subnet
- Click the default security list in Security List section.
- Click Add Ingress Rules and fill the inputs as the followings and save:
- Source type for CIDR
- 0.0.0.0/0 for SOURCE CIDR
- IP protocol for TCP
- Source Port Range for default blank
- Destination Port Range for 2000
- Focalboard for Description (optional)
Setup Namecheap Subdomain
After that, I will set a subdomain for our app. As I have purchased a .com domain at Namecheap, I will show you how to link our app with subdomain in Namecheap DNS setting.
Other domain providers will also have similar setup.
Login to Namecheap account, go to domain list and click on manage button at the target domain.
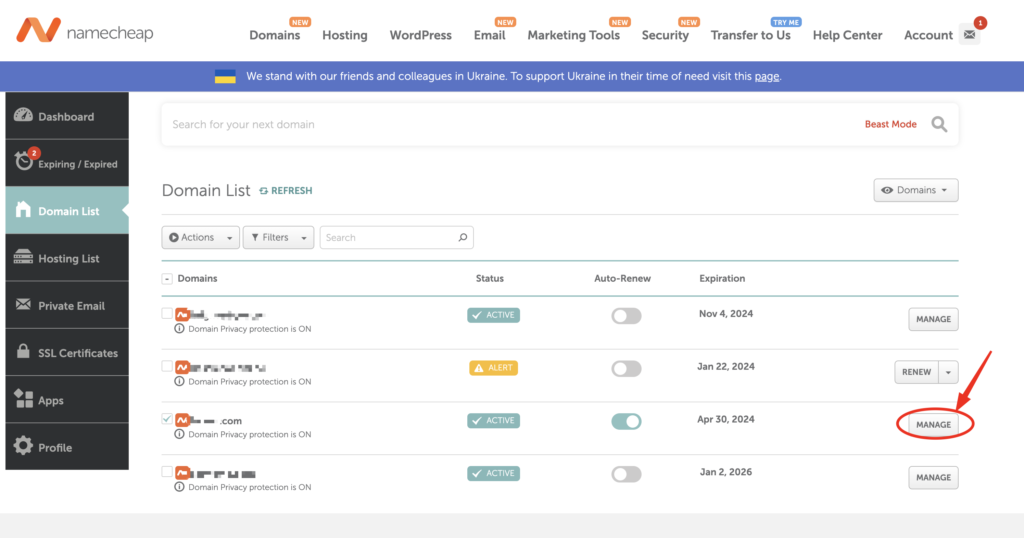
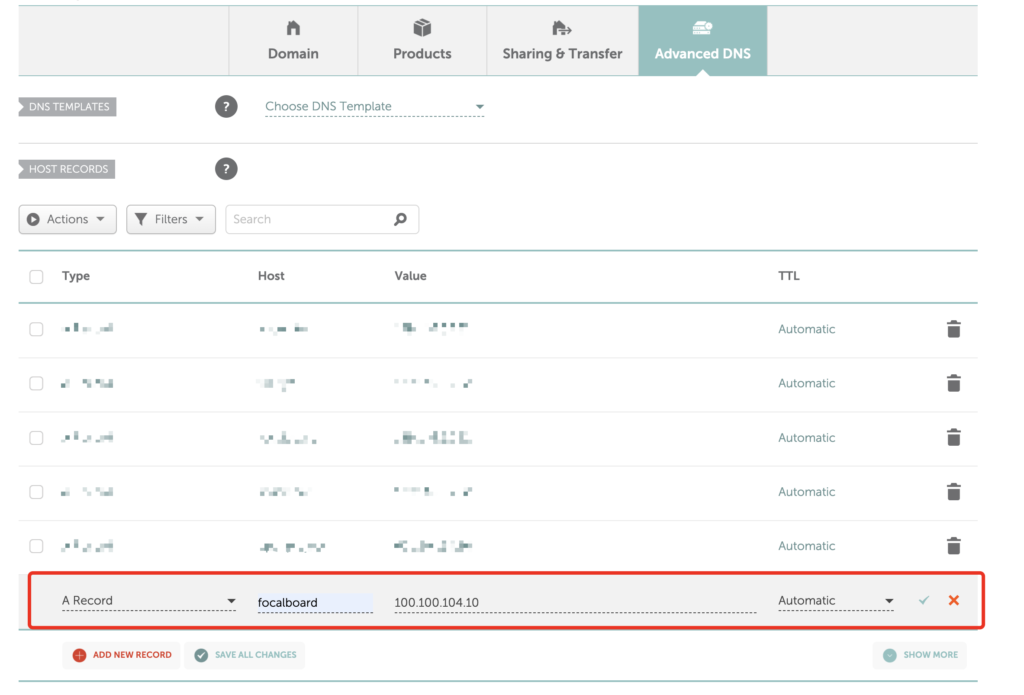
Go to Advanced DNS setting and add ‘A Record’ with host focalboard and our IP address as follow. Note: the IP address in the following image is for demonstration purpose only, use your server IP address.
Setup Nginx Reverse Proxy
Then we will setup Nginx reverse proxy.
In your terminal, open the nginx config file with nano text editor with the following command (remember to replace your domain at ‘yourdomain.com’):
sudo nano /etc/nginx/sites-available/yourdomain.comAdd the following Focalboard Nginx configuration:
(Don’t forget to replace your domain at yourdomain.com.)
server {
   server_name focalboard.yourdomain.com;

   location ~ /ws/* {
       proxy_set_header Upgrade $http_upgrade;
       proxy_set_header Connection "upgrade";
       client_max_body_size 50M;
       proxy_set_header Host $http_host;
       proxy_set_header X-Real-IP $remote_addr;
       proxy_set_header X-Forwarded-For $proxy_add_x_forwarded_for;
       proxy_set_header X-Forwarded-Proto $scheme;
       proxy_set_header X-Frame-Options SAMEORIGIN;
       proxy_buffers 256 16k;
       proxy_buffer_size 16k;
       client_body_timeout 60;
       send_timeout 300;
       lingering_timeout 5;
       proxy_connect_timeout 1d;
       proxy_send_timeout 1d;
       proxy_read_timeout 1d;
       proxy_pass http://localhost:2000;
   }

   location / {
       client_max_body_size 50M;
       proxy_set_header Connection "";
       proxy_set_header Host $http_host;
       proxy_set_header X-Real-IP $remote_addr;
       proxy_set_header X-Forwarded-For $proxy_add_x_forwarded_for;
       proxy_set_header X-Forwarded-Proto $scheme;
       proxy_set_header X-Frame-Options SAMEORIGIN;
       proxy_buffers 256 16k;
       proxy_buffer_size 16k;
       proxy_read_timeout 600s;
       proxy_cache_revalidate on;
       proxy_cache_min_uses 2;
       proxy_cache_use_stale timeout;
       proxy_cache_lock on;
       proxy_http_version 1.1;
       proxy_pass http://localhost:2000;
   }
To save the file and go back to terminal, click Ctrl+X, choose Y and hit Enter.
Check the nginx syntax with this command: sudo nginx -t
We should see syntax is ok and test is successful message at this step.
Then, restart nginx with this command: sudo systemctl restart nginx
Setup HTTPS with Certbot
Next I will setup SSL certificate using certbot with the following commands so that our app can be accessible from HTTPS:
sudo apt install snapd

sudo snap install --classic certbot

sudo ln -s /snap/bin/certbot /usr/bin/certbot

sudo certbot --nginx

sudo certbot renew --dry-run
When setting up certbot https, follow the screen instructions and choose our focalboard domain.
You can check more details about certbot https configuration from here.
After certbot configuration, go to browser and open https://focalboard.yourdomain.com
The app should be running properly with https protocol.
Conclusion
There are many steps in our setup and there may be somewhere you don’t understand. It can be easier if you install and use standalone app on your device. However, the purpose of setup Focalboard on Oracle vps or any cloud server is that we want to access our data from any device or place. From this tutorial, we can run the app on ubuntu server with a subdomain and we can access the app from any devices and have fully sync.
Reference for setup Focalboard on personal server (Ubuntu) is here.


Leave a Reply