In this article, I am going to talk about how to setup or self-host a free open-source backend as a service solution (BaaS), Appwrite on Oracle Ubuntu VPS server with Nginx Reverse Proxy. I will also setup subdomain and https.
What is Appwrite

Appwrite is an open-source backend as a service platform that lets you add Auth, Databases, functions and storage solutions to your applications which you can use as a full backend for your web applications, mobile applications, etc. Up until Jan 2024, Appwrite github repo has received 38.8k stars and its docker image has 5M+ pulls at docker hub.
The platform is currently under high development and there may be high volume of changes from version to version. However, self-host availability, rich SDKs for various platforms, including email, SMS, and infrastructure services and user friendliness are attractive to many developers around the world, compare to Firebase or other BaaS solutions.
Appwrite aims to provide developers with a comprehensive and integrated set of backend services that reduces the need for repetitive backend coding, allowing them to focus more on creating unique user experiences.
Setup Appwrite on Oracle Ubuntu VPS
I assume you already have Ubuntu running and already installed Docker engine and Nginx on your Ubuntu server. I will install appwrite:1.3.4 in this article.
Run this command in the terminal to download docker containers:
docker run -it --rm \
    --volume /var/run/docker.sock:/var/run/docker.sock \
    --volume "$(pwd)"/appwrite:/usr/src/code/appwrite:rw \
    --entrypoint="install" \
    appwrite/appwrite:1.3.4
The prompts for choosing http and https ports will occur. For this, we will choose port 2023 as http port and 2024 as https port.
Hostname and DNS A record hostname are as default “localhost”.
Then set secret API key for Appwrite as you like. Example API key: saihan-appwrite-key-Chadsgkas
The installation will keep going automatically and if “Appwrite installed successfully” message occur, installation finished.
Checking
Check if the app running on localhost:2023 properly with this command:
curl --head http://localhost:2023The return message with 200 Ok should occur.
Setup Firewall and Network Setting
In my case, I am using Oracle cloud VPS instance to host the platform. So I need to configure firewall setting and network setting. Based on the hosting providers, the setup may be slightly different.
To configure the system’s firewall to allow incoming TCP connections on port 2000 in order to be accessible from other devices, we need to run this command:
sudo iptables -I INPUT -m state --state NEW -p tcp --dport 2023 -j ACCEPT
sudo iptables -I INPUT -m state --state NEW -p tcp --dport 2024 -j ACCEPT
Then I am going to add the opening port to VPS subnet ingress rule.
Go to VPS instance page -> Subnet -> Security Lists -> Default Security List -> Add Ingress Rules.
Add new Ingress Rules as the followings:
- Source type for CIDR
- 0.0.0.0/0 for SOURCE CIDR
- IP protocol for TCP
- Source Port Range for default blank
- Destination Port Range for 2023
- ‘Appwrite’ for Description (optional)
Setup Nginx Reverse Proxy
Go to nginx config file with this command (Don’t forget to replace yourdomain.com with your domain) :
sudo nano /etc/nginx/sites-available/yourdomain.comAdd the following configuration to nginx config file.
server {
        listen 80;
        server_name appwrite.yourdomain.com;

        location / {
                proxy_pass http://localhost:2023/;
                proxy_http_version 1.1;
                proxy_set_header   Host               $host:$server_port;
                proxy_set_header   X-Real-IP          $remote_addr;
                proxy_set_header   X-Forwarded-For    $proxy_add_x_forwarded_for;
                proxy_set_header   X-Forwarded-Proto  $scheme;
}
}
To save the file and go back to terminal, click Ctrl+X, choose Y and hit Enter.
Check the nginx syntax with this command: sudo nginx -t
We should see syntax is ok and test is successful message at this step.
Then, restart nginx with this command: sudo systemctl restart nginx
After Nginx setup, you need to go to your domain management page and create subdomain, add the server IP address to the DNS setting of your domain to link the subdomain with the app. The domain setup may be slightly different based on domain providers you are using.
In my case, as I am using Namecheap, my domain setup is as follow:
- Login to Namecheap account and go to domain list
- Click on ‘Manage’ at the target domain
- At advanced DNS setting, add a new type as A Record, host as ‘appwrite’, value as server IP address and save.
Setup HTTPS with Certbot
Next I will setup SSL certificate using certbot with the following commands so that our app can be accessible from HTTPS:
sudo apt install snapd

sudo snap install --classic certbot

sudo ln -s /snap/bin/certbot /usr/bin/certbot

sudo certbot --nginx

sudo certbot renew --dry-run
When setting up certbot https, follow the screen instructions and choose appwrite domain that we created previously.
You can check more details about certbot https configuration from here.
After certbot configuration, go to browser and open https://appwrite.yourdomain.com
The app should be running properly with https protocol.
Sign up your root account at sign up screen at first run.
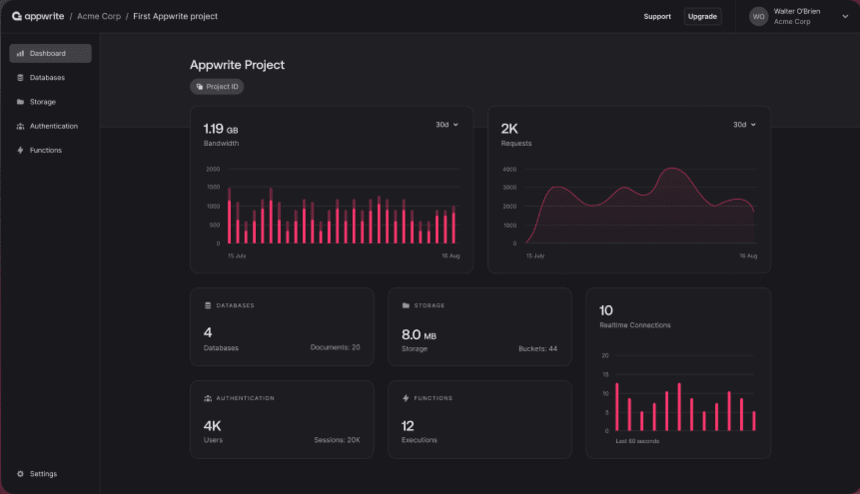
After login and create your first project, you should see something similar as the following image.

Conclusion
From this tutorial, I hope you get the idea how to setup Appwrite on Oracle Ubuntu VPS or any other Ubuntu server.
Although Appwrite is a relatively newer entrant in the BaaS space, it has quickly gained popularity due to its ease of setup and a wide array of built-in features. It’s a self-hosted solution, offering a suite of tools for building backend applications more efficiently.
There are also many sample apps at Built with Appwrite website and you can see many developers have built many desktop, web and mobile applications using Appwrite.


Leave a Reply